How to Add an Embeddable Buyback Tool to Your Website

Cullin McGrath
Chief Executive Officer

Every time you send a customer to a third-party site to complete a trade-in, you hand them over to your competitors. They leave your store, land on someone else’s platform, and the relationship you worked so hard to build starts to quietly slip away.
It does not have to work that way. With an embeddable buyback tool, your customers never leave your website to submit a trade-in. The entire experience, from entering their device details to getting an instant offer, happens right there on your domain. That means more trust, stronger brand loyalty, and a seamless experience that actually feels like yours.
This guide walks you through what that looks like in practice, which integration path fits your setup, and how to get your widget live without a headache.
Stop sending your trade-in customers to third-party sites
Here is something most eCommerce store owners do not realize until it is too late: every time you send a customer to a third-party site to complete a trade-in, you are handing them over to your competitors. They leave your store, land on someone else’s platform, and the relationship you worked hard to build starts to quietly slip away.
It is not a small problem. You lose visibility into customer behavior. You lose control over the experience. You lose the chance to upsell or cross-sell while they are still in a buying mindset. And when they land on a competitor’s platform, there is always a risk they browse around and buy from someone else entirely.
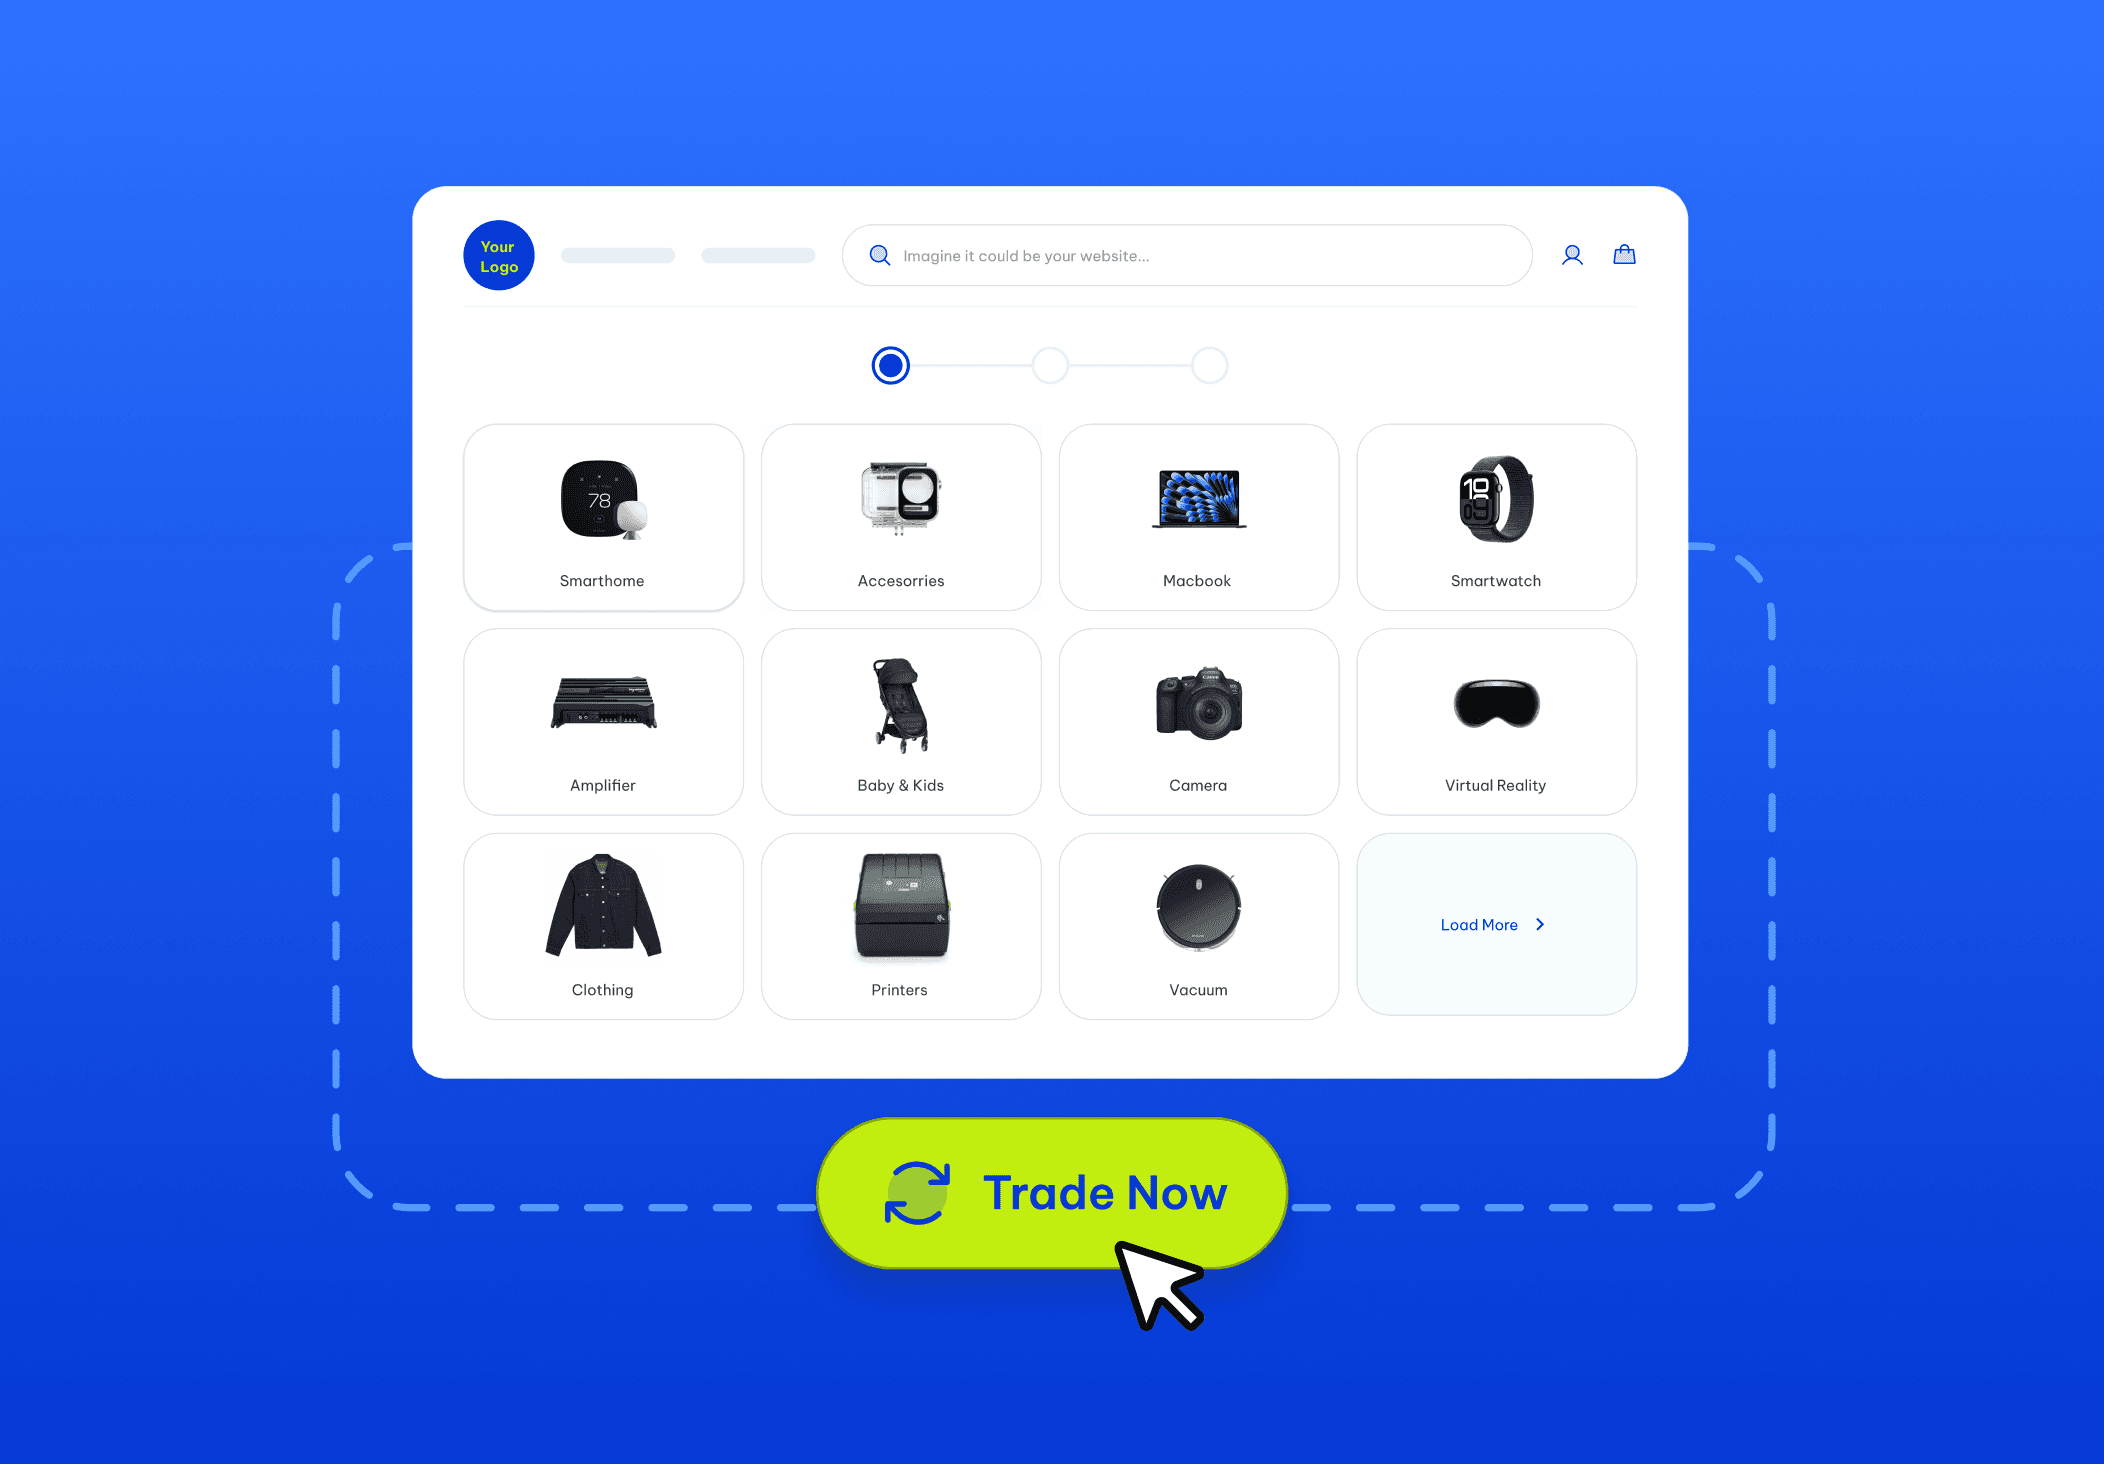
Keeping the trade-in on your site fixes all of that. The customer sees your branding, stays on your URL, and goes through a flow that feels like a natural part of your store. That kind of experience builds confidence. And confidence is what gets people to hit submit.
One side note worth making: some store owners go looking for an AI-assisted buyback platform expecting machine learning to do the heavy lifting on pricing. In reality, the most profitable trade-in programs are built on condition-based pricing rules that you configure and control. Predictability beats experimentation when real money is on the line.
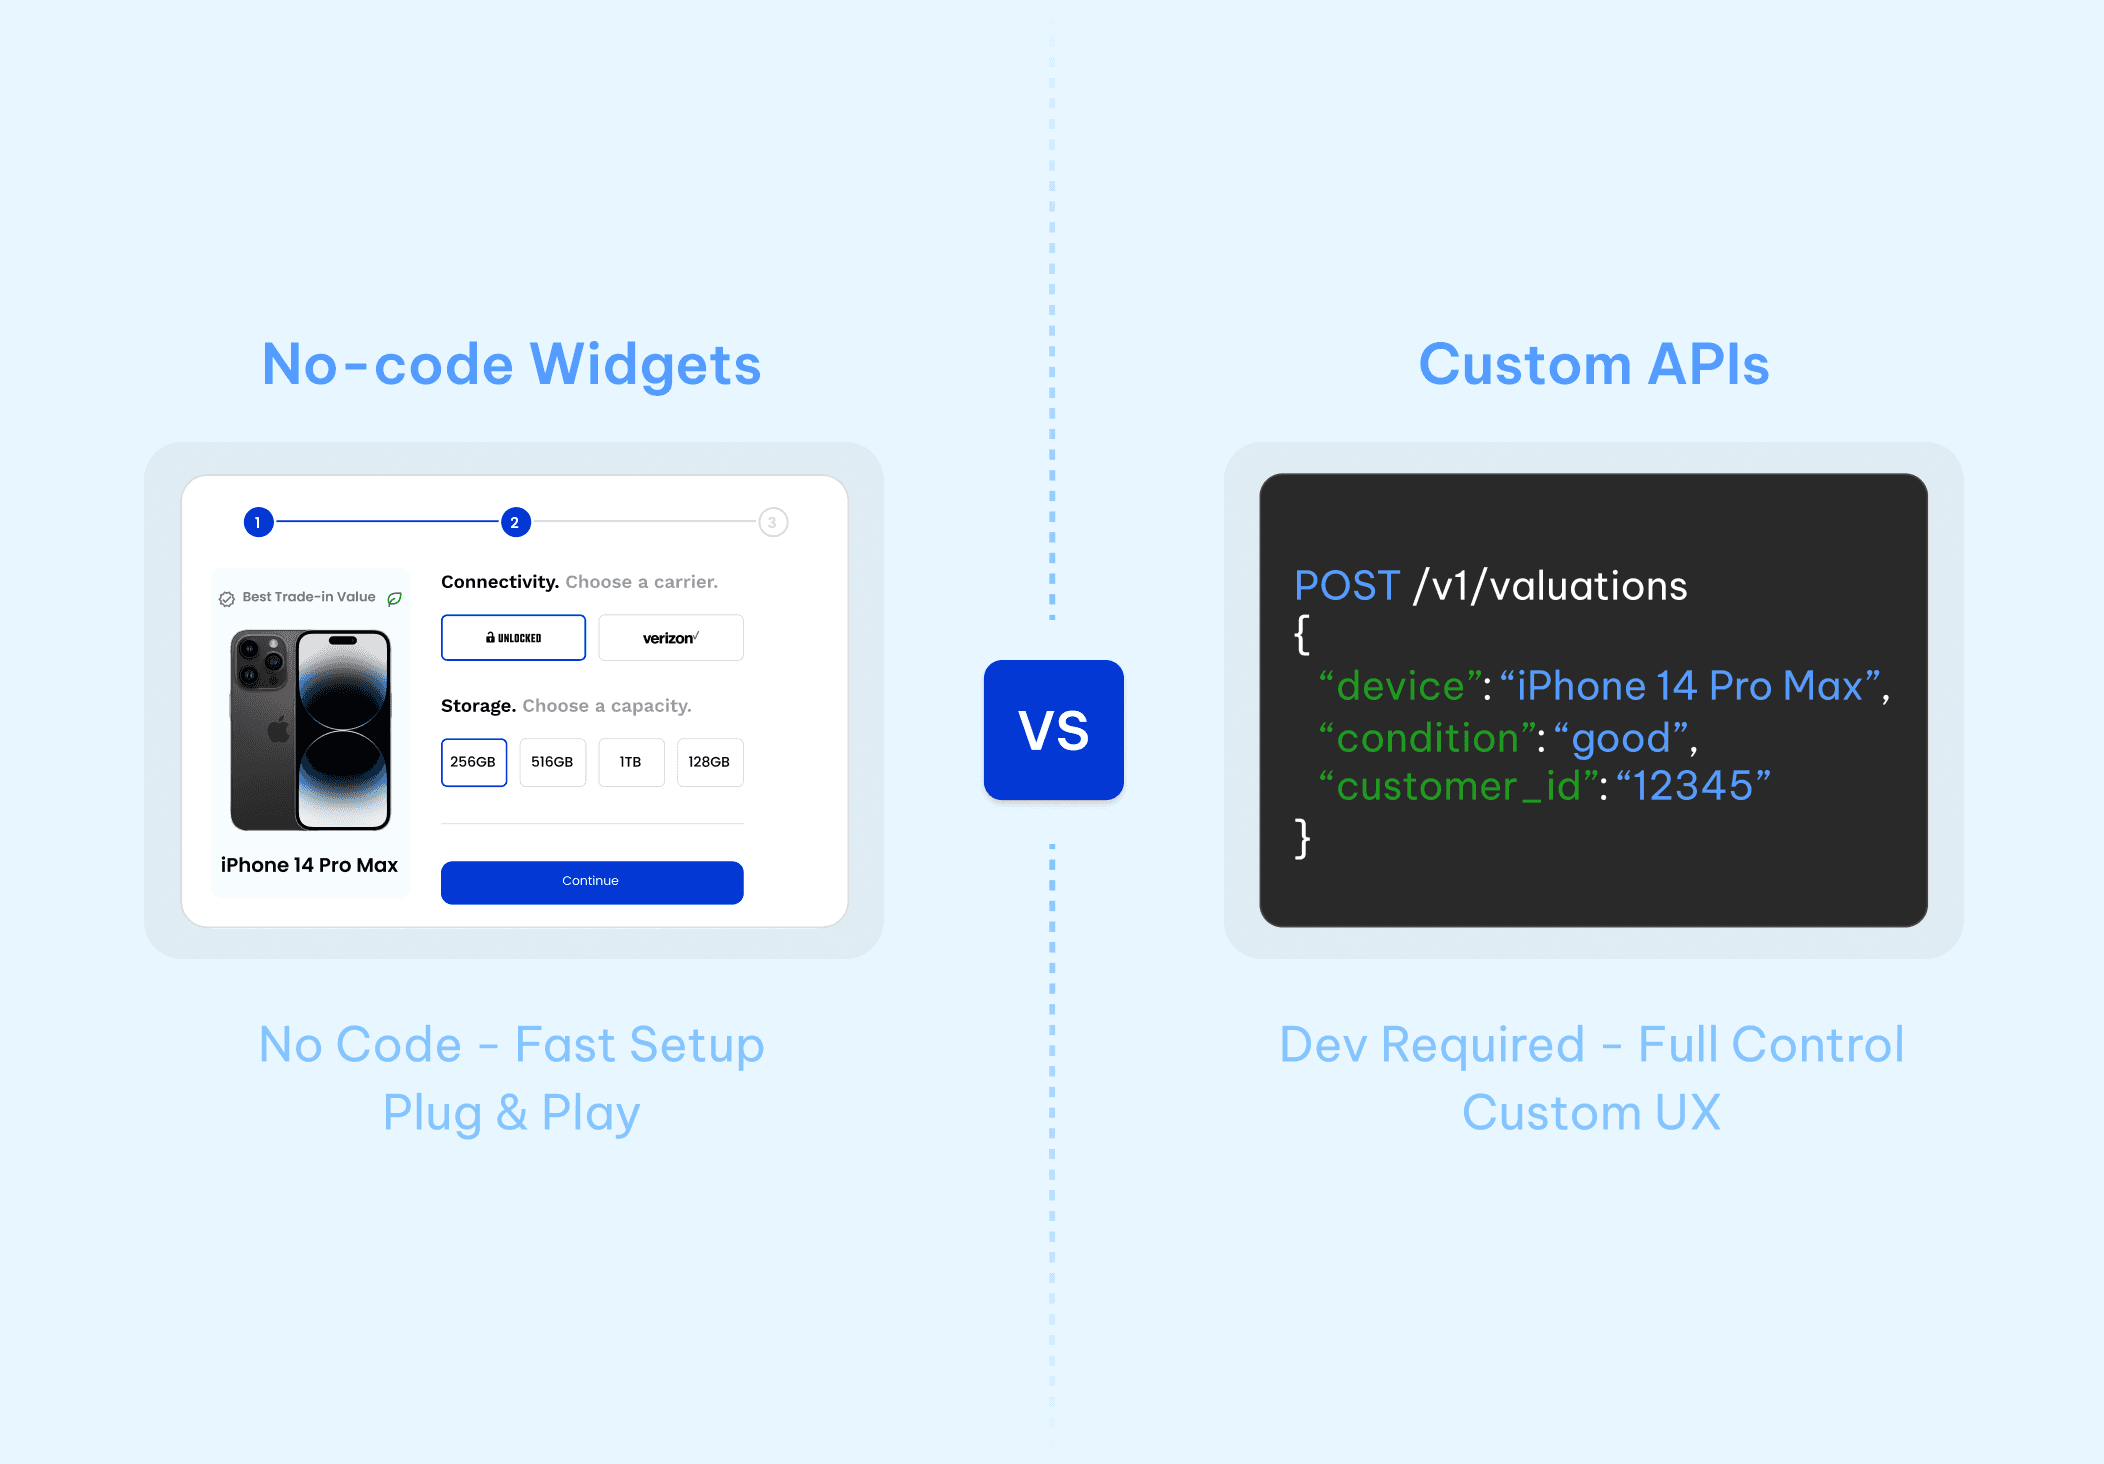
No-code widgets vs. custom APIs: which one is right for you?
Once you decide to bring trade-ins in-house, the next decision is how to actually do it. There are two real options: a no-code embeddable widget, or a developer-facing API. Both work. The right one depends on who you have on your team and how much customization you actually need.
Most merchants do not need a custom API. But some do. Knowing the difference saves you from overbuilding a solution or settling for one that feels too limited.
The speed of a no-code buyback widget
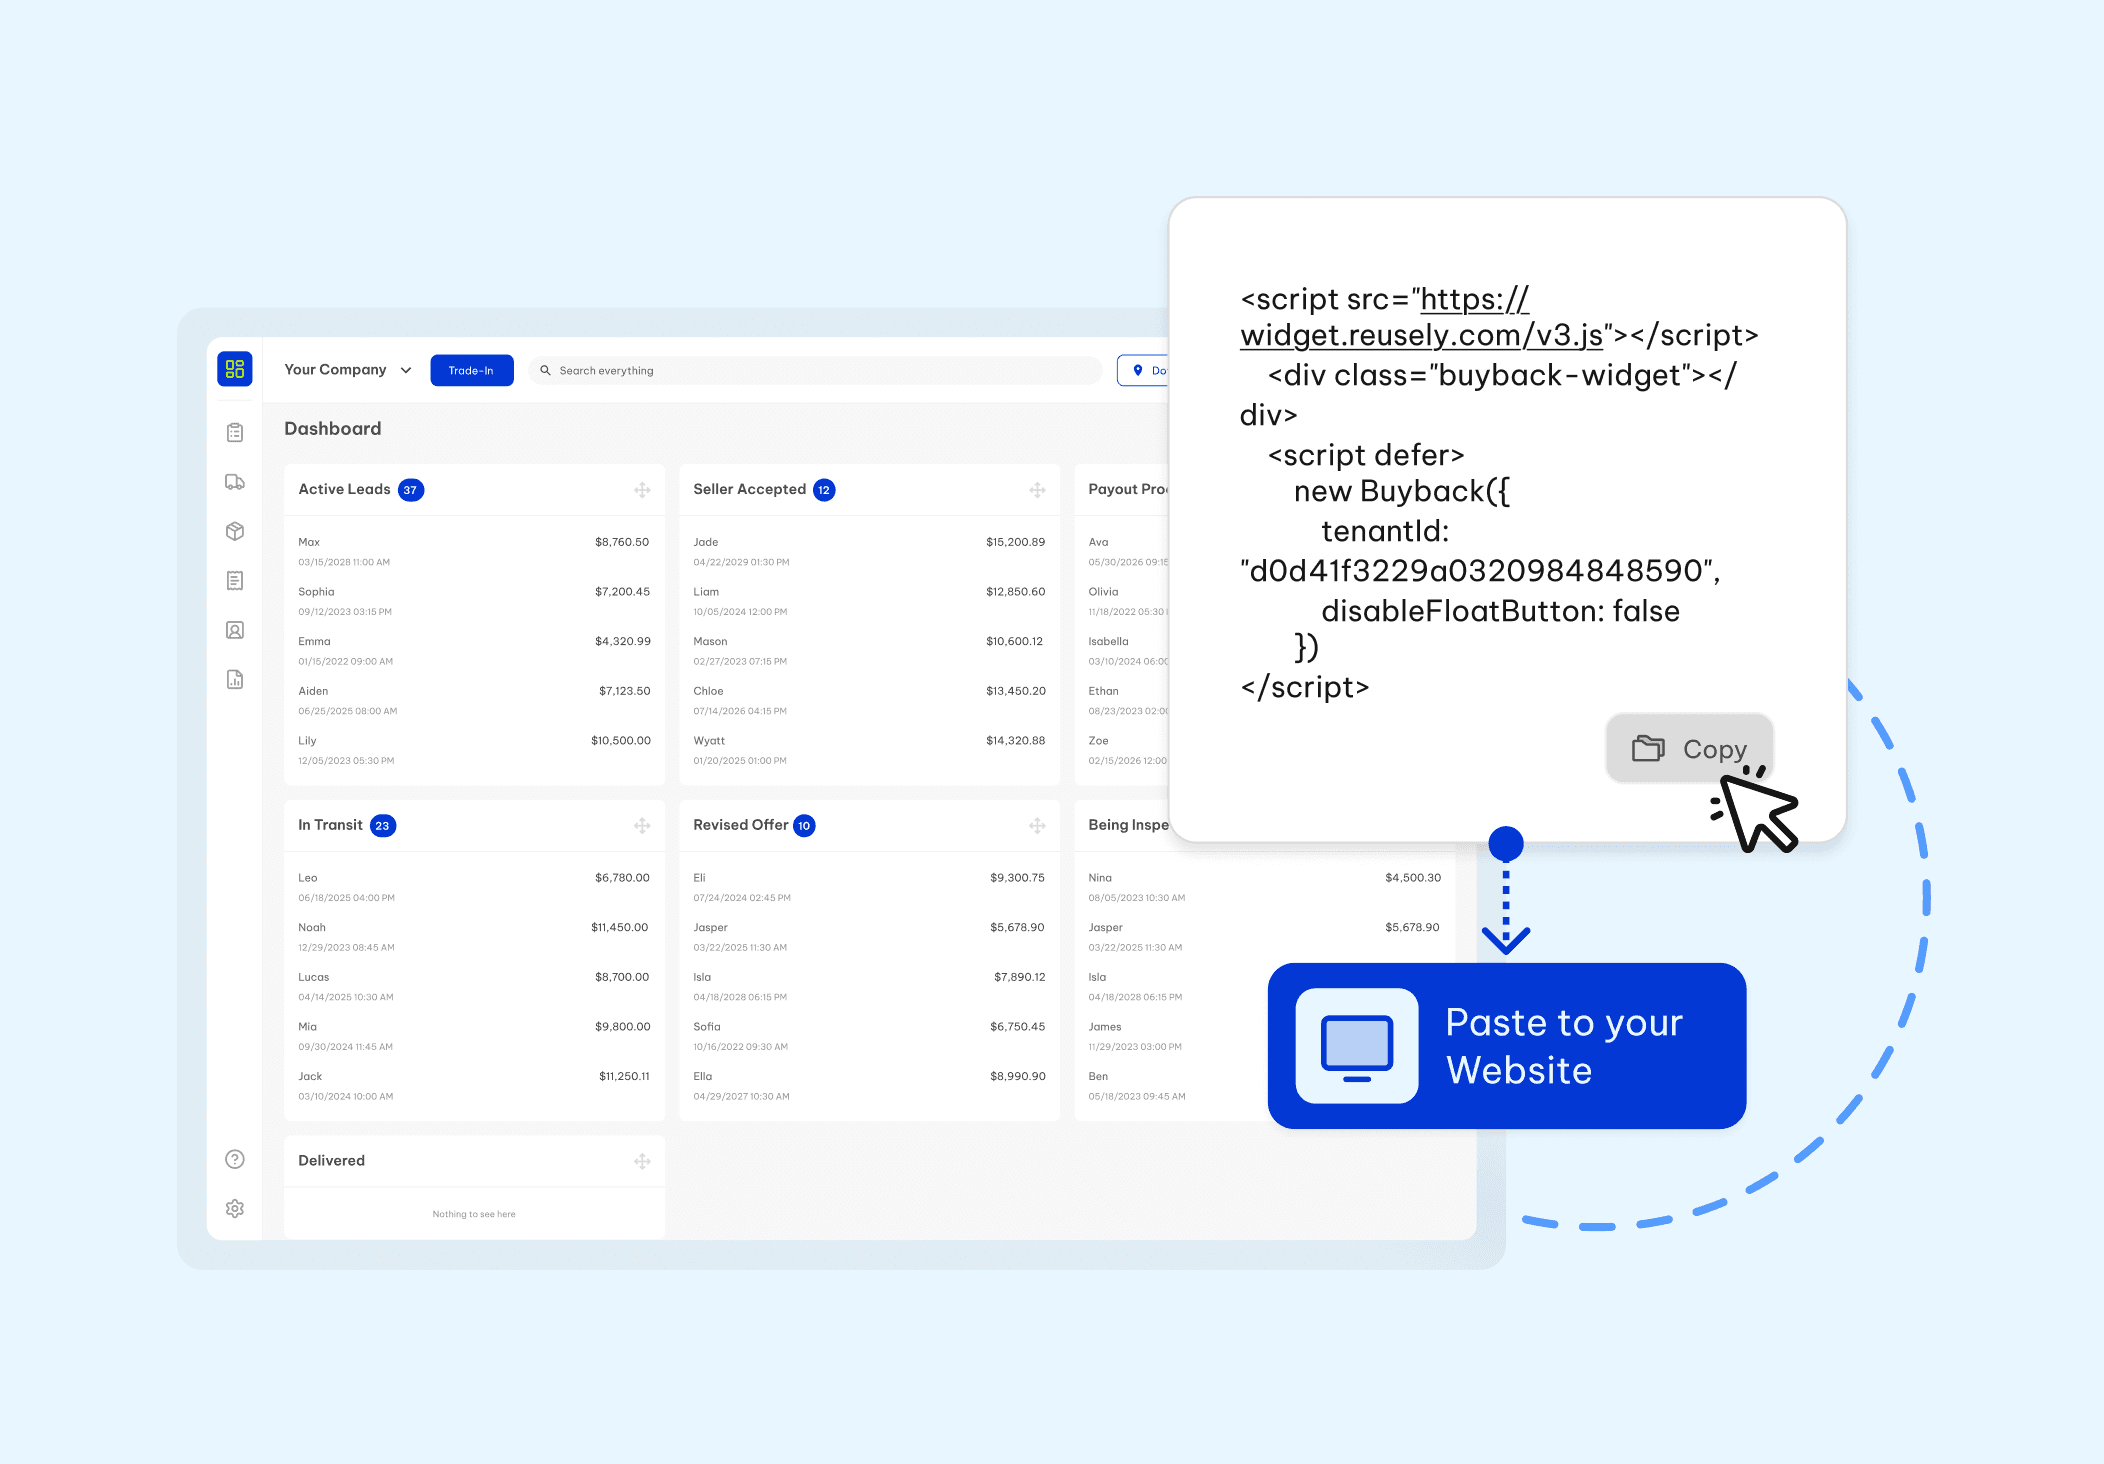
If you are a merchant or a non-technical founder, a no-code trade-in widget for your website is the fastest way to get live. Platforms like Reusely let you set up your product catalog, define your condition-based pricing rules, and generate an HTML snippet from your dashboard. No code needed.
You copy that snippet and paste it into a Custom HTML block on your page. That is it. The widget handles everything the customer sees: device selection, condition grading, instant offer, and checkout. It runs on your site, under your branding, around the clock.
There is zero engineering involved on your end. You are not building a trade-in tool from scratch. You are dropping in a solution that has already been tested across hundreds of merchants and letting it do the work.
Building custom flows with a trade-in API
For enterprise stores or highly customized storefronts, a trade-in API or buyback API gives your development team full control over the front-end experience. You design the UI. Reusely handles the backend, including pricing logic, condition grading, payout processing, and logistics.
Reusely offers three endpoints worth knowing about. The Public API pulls device listings, categories, and pricing configurations. The Easy Offer API returns real-time instant quotes so customers get a value without filling out a full form. And the Instant Bulk API handles high-volume operations, which is useful when you are processing large device inventories at scale.
This path makes sense when you need the trade-in flow baked directly into an existing checkout, when you want quotes appearing inline on product pages, or when you are building a mobile app. Your team builds what the customer sees. Reusely powers everything underneath.
What each API endpoint actually does
Before your developers start building, it helps to know what each endpoint is for. The Public API is your starting point. Use it to pull device listings, category structures, and pricing data into your front-end. It is what powers a product page that shows live trade-in values next to each item.
The Easy Offer API is for instant quotes. A customer enters their device, picks a condition, and gets a number back without submitting a full form. It is fast, frictionless, and converts better than multi-step flows.
The Instant Bulk API is for volume. If you run retail buyback events, B2B device purchasing, or enterprise programs where you are processing dozens or hundreds of devices at once, this is the endpoint you need.
Keeping your API key secure
Every API call to Reusely requires your API key, which you generate from your merchant dashboard. Store it as a server-side environment variable. Never put it in client-side JavaScript or a public repo. That one mistake can expose your entire account to misuse.
Rate limits apply to all endpoints, so if you need to process a large batch of devices, use the Instant Bulk API rather than looping single requests. Your integration will be faster and you will stay within allowed limits.
Test against the sandbox before you push to production
Always test your integration against Reusely’s sandbox environment before going live. Send requests with known device data and confirm your pricing responses match what you expect. Test your error handling too, especially for edge cases like discontinued products or items that fall outside your accepted condition grades.
A solid test phase catches problems before real customers see them. It takes an extra day. It saves you from a very bad week.
Easy Shopify and WordPress widget deployment
The question merchants ask most is how difficult it is to actually install a buyback widget on an existing store. For Shopify and WordPress users, the honest answer is: not difficult at all.
For a Shopify trade-in integration, you go to the page where you want the widget to appear, add a Custom HTML section, and paste in the embed code from your Reusely dashboard. No app to install. No theme expertise required. The widget is live.
For WooCommerce, the process is essentially the same. Drop the HTML snippet into a Custom HTML block in the WordPress block editor and you are done. Most merchants go from opening their Reusely dashboard to having a live widget in under fifteen minutes.
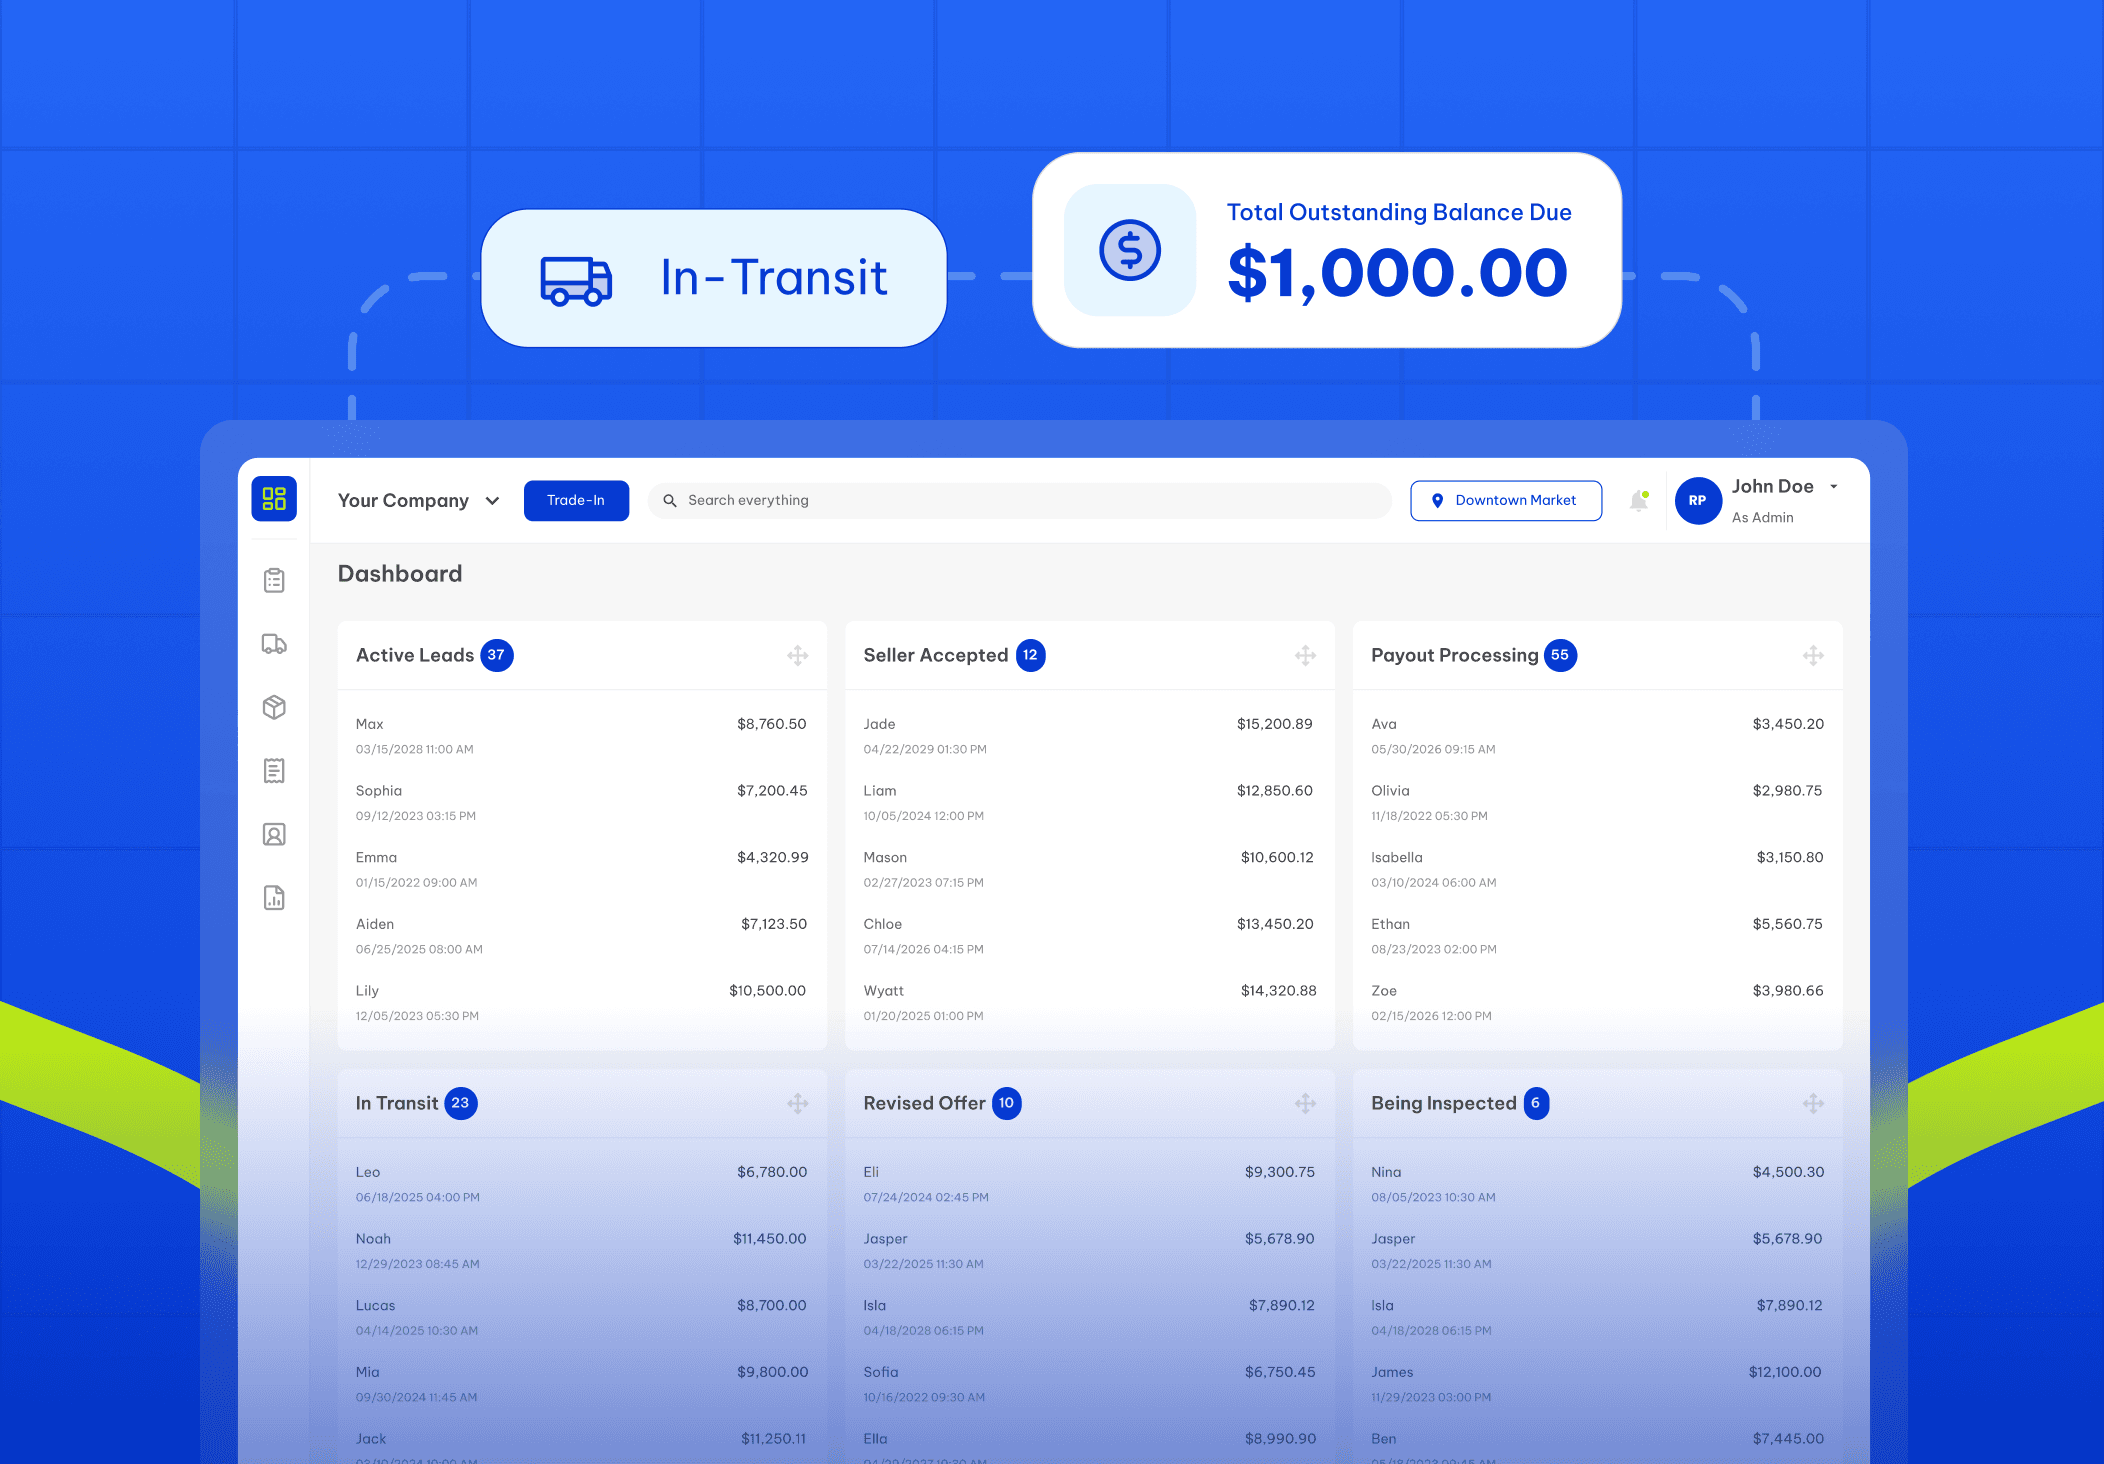
While the widget handles the customer-facing side, Reusely takes care of everything on the backend. Shipping labels go out through EasyPost or ShipEngine. Payouts process through Tremendous. Inventory gets tracked in real time so you always know what is coming in and what it is worth.
You are not just getting a widget. You are getting the full operation, sitting quietly underneath your store.
Ready to launch your trade-in widget?
Your customers already want to trade in their old devices. That demand is there whether you capture it or not. The only question is whether they do it on your site or get pushed somewhere else to finish the transaction.
If you are ready to get a widget live today, you can pull your embed code straight from the Reusely integration docs and have it on your site within the hour. If you want to walk through the platform first or need custom API access for a larger build, you can schedule a demo and talk to someone directly.
Stop sending trade-in customers away from your store. The infrastructure to keep them there already exists. All you have to do is plug it in.


" width="1304.414px"/></svg>)